How to deploy a Django app to Heroku

Introduction
- Here we'll deploy a To-Do app I made in Django. Here's source-code.
Initial Setup
Installing Heroku CLI
On Linux
curl https://cli-assets.heroku.com/install.sh | shOn Windows
Just download and install the Heroku CLI from here.
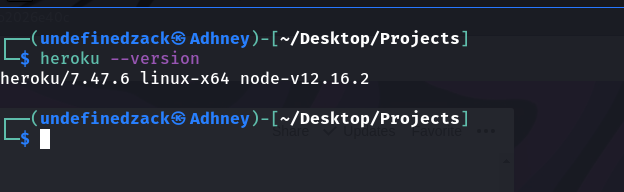
Verifying installation
To verify our CLI installation
heroku --version
Creating a Heroku Account
If you don't have a Heroku account, go ahead and create one.
Diving In!
Log In
We'll have to log in into our Heroku account through CLI.
heroku login
- It'll open up your default browser, where you'll have to enter your login credentials.
- After successful login, we can now create and manage our Heroku apps directly from the terminal.

Creating a git repository
Why do we need a git repository?
- Think of it as an update mechanism, with every commit we'll make it'll act as an update to our deployed app.
- This even helps us in creating restore points, if at any point a new update is crashing our app or has too many annoying bugs, we can hop onto the previous stable commit, and save us the downtime losses.
→ Initialize the git repository, in the directory which contains manage.py
git init
→ Add everything we have in our app, to the git repository.
git add .
→ Make a commit
git commit -m "initial commit"
Creating a Heroku app
heroku create
It'll create a Heroku app with any random name. In my case it's "salty-peak-80429".

Linking our git repository with our Heroku app
- We'll have to link our heroku app to our git repository because we know we'll be making commits to this repository but heroku doesn't know what to watch.
heroku git:remote -a salty-peak-80429
Setting up App server
- Now Django comes with it's own development server (python mange.py runserver), we have tested our app on development server ample of times.
- Well when we deploy our app to heroku we can no longer use our development server, we'll need some kind of "app server" which heroku will serve after installing the app on it's server.
- Moreover before we deploy our app we'll have to make sure that our app still functions in the app server.
Let's install an app server.
pip install gunicorn
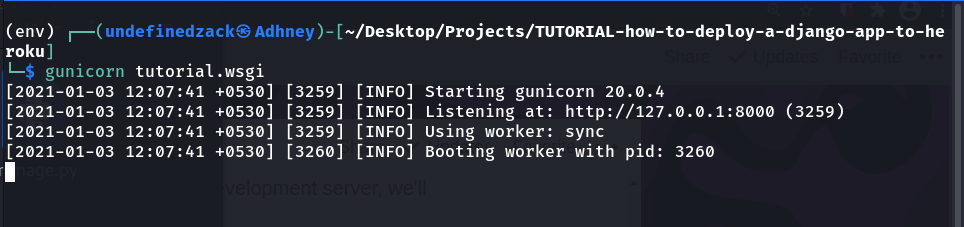
Let's test our app server. Locate the wsgi.py file in your main app directory, in my case my main directory is 'tutorial'.
gunicorn tutorial.wsgi
This command doesn't run on windows because gunicorn is incompatible with windows. For more information → here.
It'll start a server on our localhost port 8000.
- Now we'll have to test our app to make sure whether everything's working fine or not. Go ahead and have a look.
- Now we know our app functions well even on app server.
At this stage we are ready with our app to be deployed, but the thing is
- Heroku neither knows how to start our app server, nor does it know what will our app require for functioning.
- In order to tell Heroku these thing's we'll have to create 2 more files :
- Procfile
- requirements.txt
Creating Procfile
What's a Procfile?
- Heroku apps include a Procfile that specifies the commands that are executed by the app on startup. You can use a Procfile to declare a variety of process types, including:
- Your app’s web server
- Multiple types of worker processes
- A singleton process, such as a clock
- Tasks to run before a new release is deployed
- For more information about Procfile refer → here
In the main directory which contains 'manage.py', we create Procfile
touch Procfile
Now we'll have to write commands which heroku should execute on app startup, this includes starting up app server.
web: gunicorn tutorial.wsgi
Creating Requirements.txt
This file will contains all the modules we used in our app for proper functioning and yeah you don't have to manually write down every module you used, there's a command for that
pip freeze > requirements.txt
It'll automatically calculate what modules you have used with the version.

make sure you're running this command inside your virtual environment, to know how to create one → here.
Finishing up
Let's update our git repository with all the latest changes.
We'll perform
- git add . and
- git commit -m "added gunicorn (app server) with requirements.txt and Procfile"
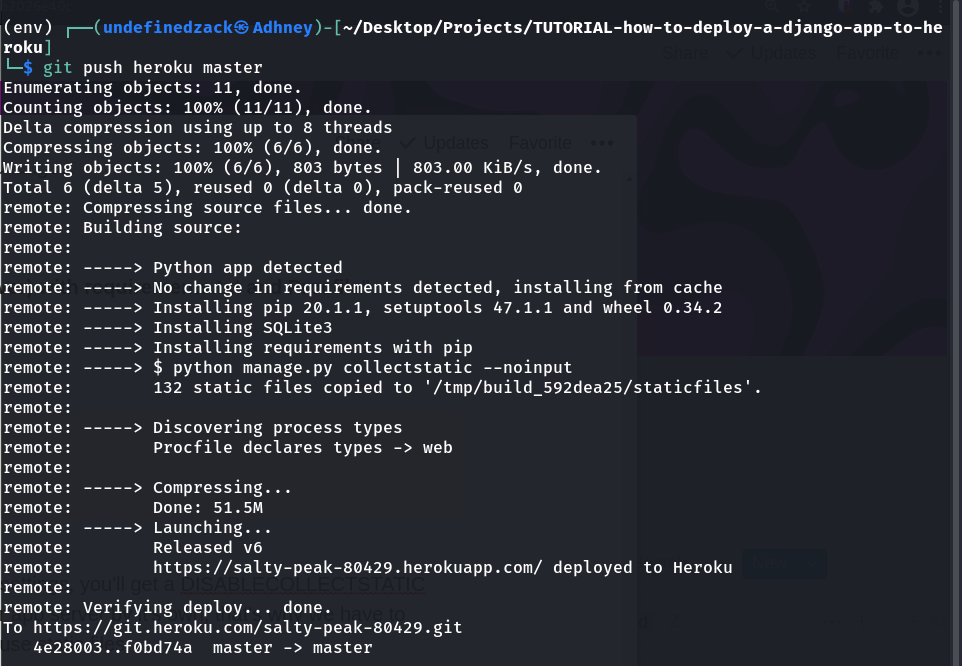
Let's push it
git push heroku master
Possible Errors
- If you haven't set static root in your Django settings, you'll get a DISABLECOLLECTSTATIC error.
- Django doesn't serve static files in the app server on it's own, that's why we have to define a place where heroku can keep and manage all the static files.
- Just add STATIC_ROOT in your settings.py file.
STATIC_ROOT = os.path.join(BASE_DIR, 'staticfiles')
- We also need to add our heroku site to ALLOWED_HOSTS in settings.py, if you haven't already
- i.e. in my case I'll have to allow https://salty-peak-80429.herokuapp.com, or we can simply allow all hosts
ALLOWED_HOSTS = ['*']
- After making changes, make a commit and try pushing with git push heroku master again.
It's Deployed!
Yup if no error occurs during push command which usually comes if you're doing it for the first time, but hang on, solution's right around the corner waiting for you, you just need to seek it.
You can check out my deployed to-do app at -
Resources
thats all peeps.......

